Table of Contents
Our demos include Elementor-built footers, allowing you to customize them just like any other page. With the Header Footer Builder, you have full control over your footer design and content.
1. Quick Access to Footer #
After a successful demo import:
- Click Visit Site to preview your website.

Note: To learn how to import demos, see the Detailed Demo Import Guide.
Once the preview page loads, follow these steps to customize your header:
- Hover over the Edit with Elementor menu in the top admin bar.
- Select Footer from the dropdown list to modify the layout and design.


2. Customize Footer from Dashboard #
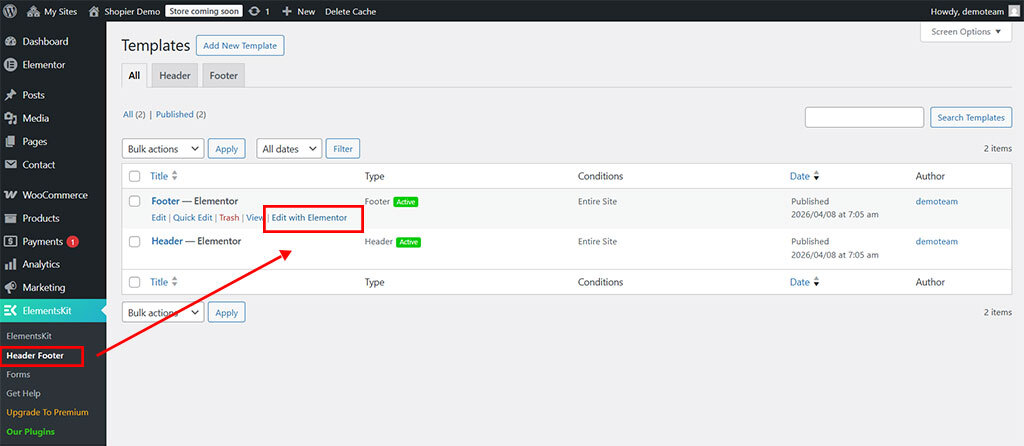
- Go to Dashboard → ElementsKit → Header Footer.
- Locate the pre-defined Footer template.
- Hover over it and click Edit with Elementor.
- The Elementor editor will open, allowing you to customize the footer.
3. Select Footer for Your Site #
- Navigate to Dashboard → ElementsKit → Header Footer.
- Hover over the footer template and click Edit.
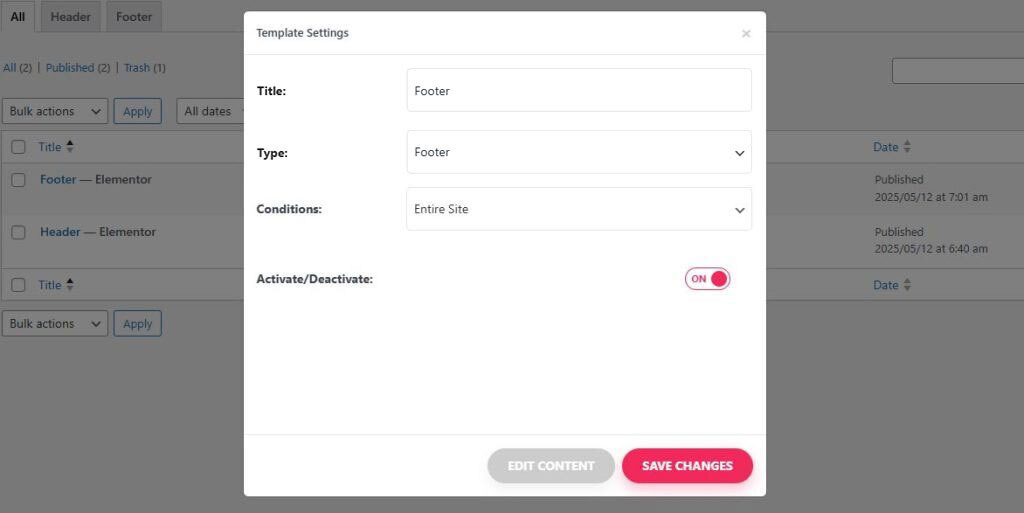
- In Template Settings, configure:
- Title – Rename the footer template.
- Type – Set as Footer.
- Conditions – Choose where the footer will be displayed.
- Activate/Deactivate – Enable or disable the footer.
- Click Save Changes.