

Table of Contents
Once you’ve successfully imported a demo template, you can easily customize the overall look and feel of your website.
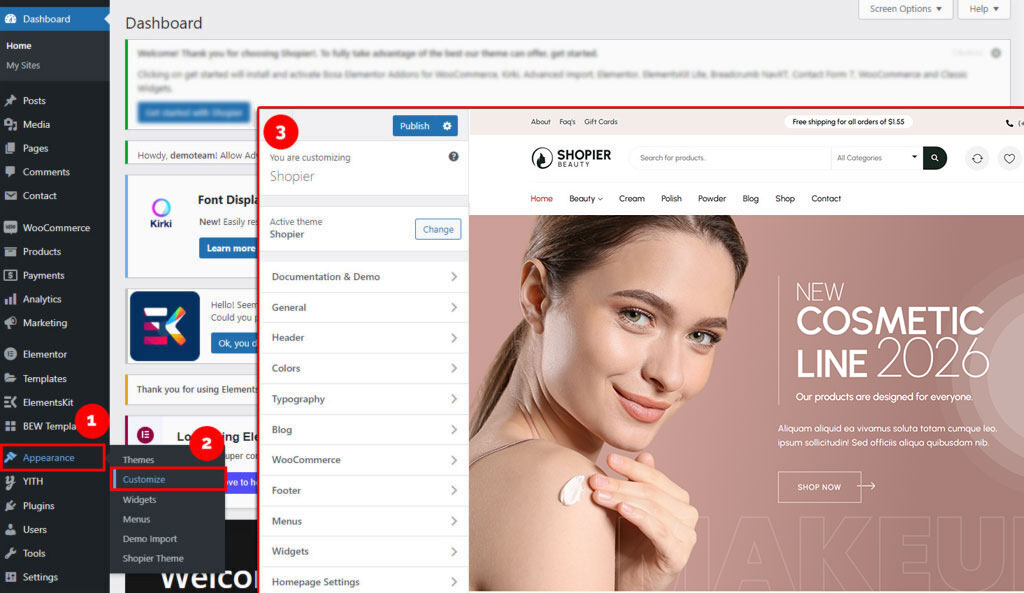
1. Open the Customizer #
- From your WordPress admin dashboard, go to:
Dashboard → Appearance → Customize
2. Access Theme Settings #
- The Customizer panel will open, where you can modify different parts of your website in real time.
- You’ll see a live preview on the right and settings on the left.
3. Customize Your Website #
You have full control over the design and layout. Common customization options include:
- Header – Edit logo, menu, and header layout
- Footer – Modify footer content and structure
- Site Identity – Update site title, tagline, and logo
- Site Layouts – Adjust overall page width and structure
- Post Layouts – Control how blog posts appear
- Preloader – Enable or disable loading animations
- Colors & Typography – Match your brand style
4. Preview Changes #
- As you make changes, you’ll see them instantly in the preview panel.
- You can also switch between desktop, tablet, and mobile views.
5. Publish Your Changes #
- Once you’re satisfied, click the “Publish” button to apply the changes to your live site.


