

Table of Contents
After completing the installation and activating shopier theme and all required plugins, you can proceed with importing the demo content.
Shopier includes a One Click Demo Import feature, allowing you to quickly set up your website using pre-built demo layouts.
1. Access Demo Import #
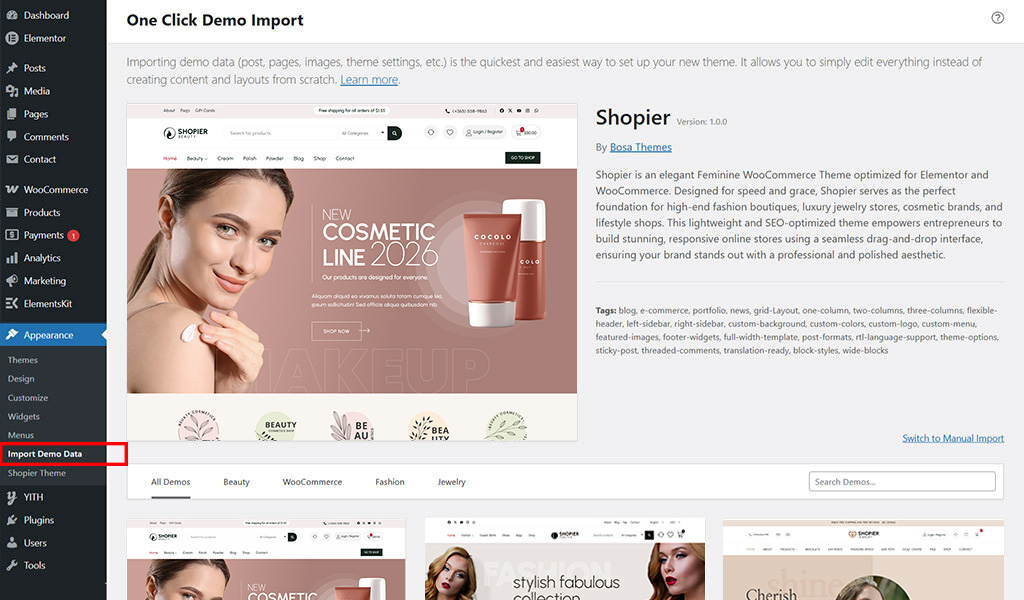
From your WordPress dashboard, navigate to:
Dashboard → Appearance → Import Demo Data
- You will see a list of pre-built Shopier demos available for import.
- Each demo includes layouts, pages, widgets, and sample content.
2. Select and Import Demo #
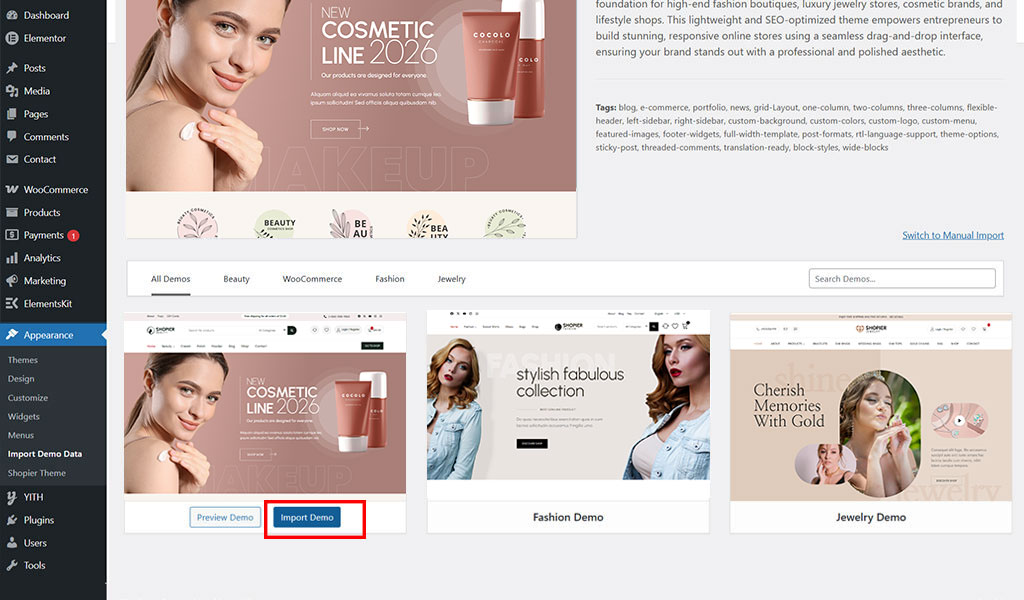
- Choose the demo you want to import.
- Click Import Demo bottom to your selected demo.
- Wait for the process to complete. This may take a few minutes depending on your server speed.
Note: Do not close the browser tab during the import.
3. Review Imported Content #
- Once the import is finished, click Visit Site to preview your website.
- Check that all layouts and demo content are displayed correctly.

4. Customize Your Demo #
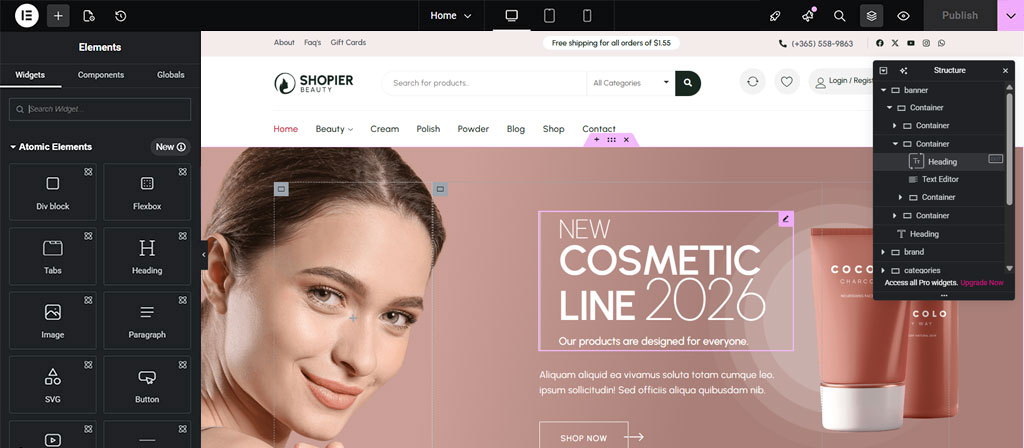
- You can now edit pages using Elementor or adjust settings in Appearance → Customize.
- Replace demo content (text, images, products) with your own to personalize your website.
5. Update Your Changes #
- Once you are done editing, click the Publish button .
- Your changes will be saved and reflected on your website.


