
Table of Contents
The Sale Countdown feature displays a countdown timer on products to create urgency and boost sales.
- The countdown box appears on both Shop Pages and Product Detail Pages.
- Supported for Simple Products only.
- This feature is enabled by default.
1. Set up Sale Countdown for Individual Products #
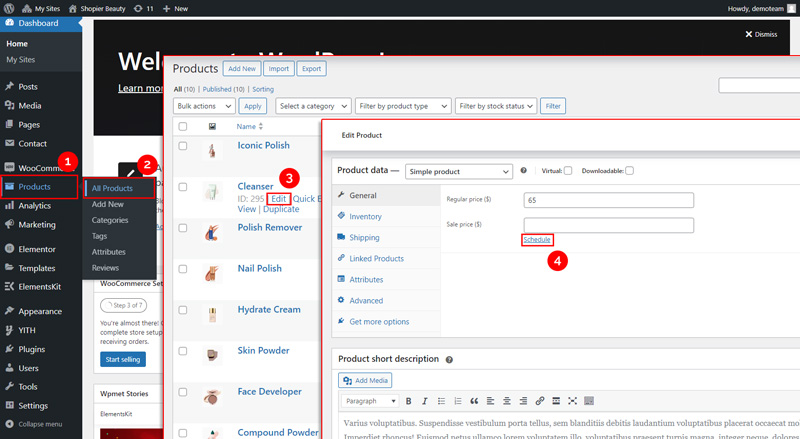
To configure a sale countdown for a specific product:
- Go to: Dashboard → Products → All Products
- Hover over the product you want to edit and click Edit
- Scroll to the Product Data section → General → Schedule
- Set the Sale Start and End Date, and optionally add a Sale Notice
- Click Update to save changes
2. Navigate to Sale Countdown Settings #
- From your WordPress dashboard, go to:
Dashboard → Appearance → Customize → Shopier WooCommerce → Sale Countdown
3. Panels in Sale Countdown #
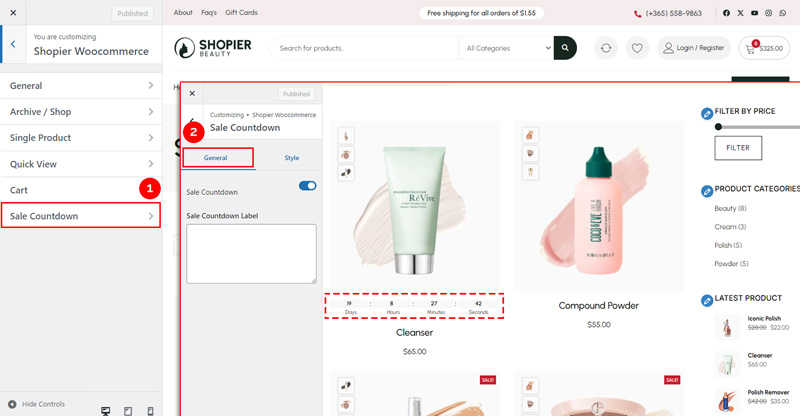
The section is divided into General and Style panels.
General Panel Options
- Enable / Disable Sale Countdown – Turn the countdown timer on or off for products.
Sale Countdown Label – Add or edit the label text displayed in the countdown box.
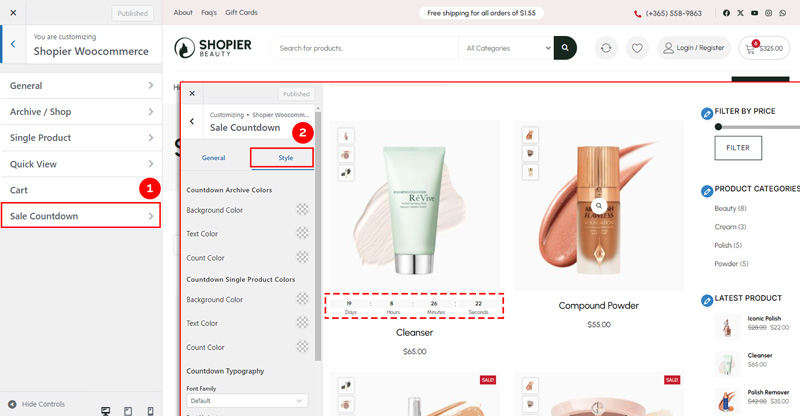
Style Panel Options
Customize the appearance of the countdown timer:
- Countdown Archive Colors – Set colors for countdowns on archive/shop pages.
- Countdown Single Product Colors – Set colors for countdowns on single product pages.
- Countdown Typography – Set font, size, and style for the countdown text.
4. Save Your Changes #
- Preview changes in real time.
- Click “Publish” to apply them to your website.


